TL; DR
You can create an e-commerce website by picking a niche, choosing a domain and platform, and setting up clear product pages with strong photos, descriptions, and prices. Add secure payment options, simple navigation, and clear shipping and refund policies. Then promote your store through SEO, email, and social media so people can find and trust you. When you track results and improve over time, you can turn visitors into repeat customers.
FAQs
1. What is an e-commerce website?
An e-commerce website is an online store where people can browse products or services, add them to a cart, and pay securely over the internet.
2. Which platform should I use for my online store?
Common platforms include Shopify, WooCommerce (WordPress), Wix, and BigCommerce. Choose based on your budget, technical skills, and the features you need.
3. What are the basic steps to create an e-commerce website?
Choose a niche, register a domain, pick a platform, select a theme or design, add products and categories, set up payments and shipping, then test everything before launch.
4. What information should each product page include?
Use clear titles, detailed descriptions, high-quality photos, price, size or color options, stock levels, and reviews if available.
5. How can I accept payments online safely?
Use trusted payment gateways such as PayPal, Stripe, or local providers. Make sure your site has SSL (https) so customer data is encrypted.
6. How do I handle shipping and delivery?
Set clear shipping zones, fees, and delivery times. Offer tracking where possible and explain your policies on delays, customs, and lost items.
7. What policies do I need on my e-commerce site?
You should have a privacy policy, terms and conditions, refund and return policy, and clear contact information.
8. How can I bring traffic to my new online store?
Use SEO, social media posts, email marketing, online communities, and possibly paid ads. Focus on helpful content and genuine engagement.
9. How do I turn visitors into buyers?
Make the site fast, mobile-friendly, and simple to use. Offer clear benefits, social proof, secure checkout, and limited-time offers or discounts when needed.
10. How do I measure if my e-commerce website is successful?
Track visits, conversion rate, average order value, customer retention, and total sales. Use these numbers to improve your products, marketing, and customer experience.
Introduction
My first “online shop” was not really a shop. It was a page on a simple website where I listed a few books and told people to email me if they wanted one. No cart. No payment gateway. No automation. Just hope and improvisation.
From there to proper e-commerce platforms, payment integrations, and global customers has been a long journey. Along the way I learned something important: you do not need to start perfect, but you must start wisely.
An e-commerce website is simply a shop that lives on the internet. It lets people:
- See what you sell
- Decide if it fits their needs
- Pay you safely
- Receive the product with minimal stress
Done well, it can bring you customers from places you have never visited. Done carelessly, it can drain your time and money without results.
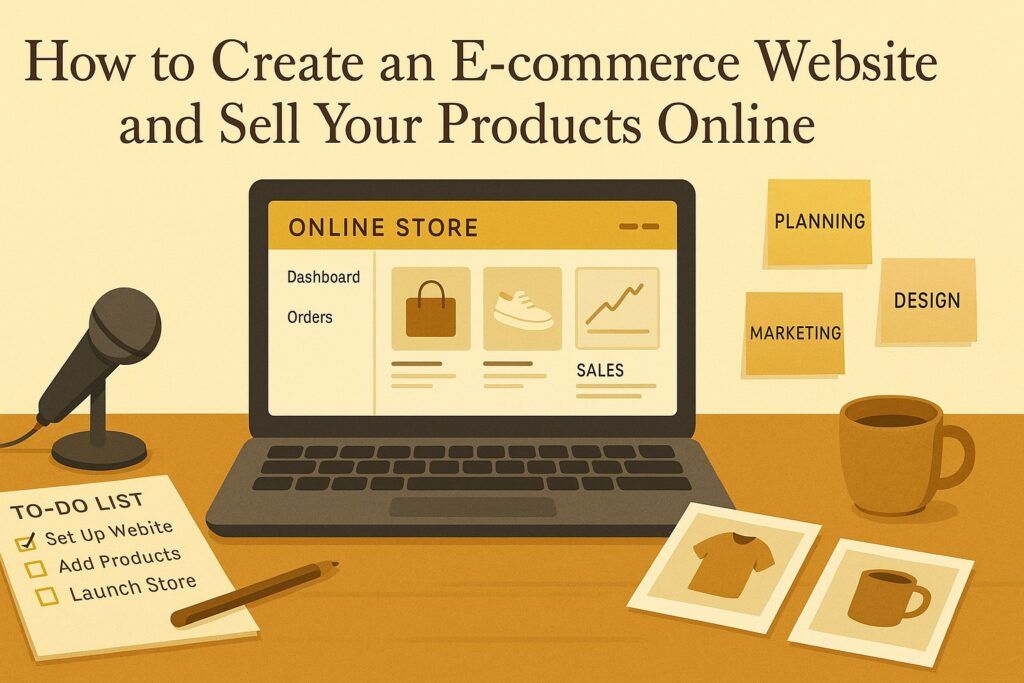
In this guide, I will walk you through how to build an e-commerce website and start selling online, using simple language and honest stories from my own experience as an African creator working with limited resources and big dreams.
Step 1: Get Clear On What You Want To Sell And Why
Before you touch platforms or domain names, sit with a notebook and answer some basic questions.
- What exactly am I selling?
- Physical products? (books, clothes, electronics, crafts)
- Digital products? (ebooks, courses, templates, music)
- Services? (consulting, coaching, design, editing)
- Who am I selling to?
- Students, parents, professionals, NGOs, small business owners?
- Local customers only, or regional and global?
- Why would someone choose my product over what already exists?
- Price, quality, story, convenience, local relevance, speed of delivery?
When I began “selling” my books online, I thought the answer was obvious: “Because it is my story.” That may move a few friends, but it does not scale. Over time I learned that serious readers wanted:
- Clear positioning: Is this book self-help, theology, nationalism, or creative nonfiction?
- Clear benefit: Will this book help me solve a problem, understand my world better, or find meaning in my own story?
Do the same for your products. Clarity now will save you time later when you choose your platform, design your store, and write product descriptions.
Step 2: Choose The Right E-commerce Platform For Your Stage
An e-commerce platform is simply the tool that handles the shop part of your website: products, carts, checkout, payments, and basic management.
Here are some popular paths and when they make sense.
Shopify – when you want speed and simplicity
- You pay a monthly fee
- Hosting, security, and basic structure are handled for you
- You choose a theme, add products, connect payments, and go
Good for:
- Non-technical founders who want a serious store without managing servers
- Businesses ready to pay more each month for simplicity and support
WooCommerce – when you want control and flexibility
WooCommerce turns a WordPress site into a full online store.
- The plugin itself is free
- You pay for hosting, domain, SSL certificate, and any extra plugins you choose
- You have deep control over design and features
Good for:
- People already comfortable with WordPress
- Businesses that want to own their platform and avoid high monthly fees
- Those planning to add blogs, membership areas, and extra features on the same site
Wix or similar builders – when you want visual control and ease
- Drag-and-drop interface
- Templates and built-in e-commerce features
- Hosting included
Good for:
- Small shops that want a good-looking site fast
- Owners who prefer visual editing over technical settings
A quick story here
At one point, I moved my main site from one hosting provider to another. It was painful. Broken links, missing images, strange errors. That experience taught me:
- Do not choose your platform only because a big guru uses it
- Choose what matches your skills, budget, and long-term plans
If you hate technical work, a fully hosted solution may be worth the extra cost. If you want to build a large content site with a store attached, WordPress with WooCommerce may serve you better.
Step 3: Register A Domain Name That Carries Your Brand
Your domain name is your address on the internet. For example:
- amazon.com
- jumia.co.ke
- yourbrand.com
For authors and personal brands, I usually recommend:
- yourfullname.com if it is available
- or yourfullnamebooks.com, yourfullnamewrites.com
For product brands:
- Short, clear, and easy to spell
- Prefer .com if you can, or a strong local domain like .co.ke, .ss, .ug if you mainly serve that country
Practical tips from my own struggles:
- Avoid long phrases; they are hard to type on mobile phones
- Avoid clever spellings that people will always miss
- Say the domain out loud: if someone hears it on the radio, can they type it correctly?
You can register domains through providers like Namecheap, GoDaddy, or your hosting company. Whichever provider you use, remember:
- Use your own email and account, not someone else’s
- Store your login details carefully
- Turn on renewal reminders so you do not lose your domain by accident
Step 4: Choose Reliable Hosting (If Your Platform Needs It)
Hosted platforms like Shopify include hosting. Self-hosted ones like WooCommerce require you to choose a hosting provider.
From living between South Sudan and Kenya, I learned one hard reality: a slow website kills trust. A site that does not load on cheap phones and weak internet will silently lose you many customers.
When picking hosting:
- Prioritise speed and uptime, not just the cheapest offer
- Look for free SSL (https) so customers feel safe entering card details
- Check for good support, especially if you work across time zones
If your budget is very tight, start with a decent basic plan, but be ready to upgrade when traffic grows. It is better to start modestly and improve than to stay on a slow, overloaded server for years.
Step 5: Design A Store That Feels Human And Easy
Many people think design means decorations. In e-commerce, good design mainly means this:
- Can a busy, distracted visitor understand what you sell within 3 to 5 seconds?
- Can they find what they need without thinking too hard?
When I visit African sites that sell amazing products, I often see the same problems: tiny text, overcrowded pages, confusing menus, and banners everywhere. Beauty is good. Confusion kills.
Key elements of a strong e-commerce design:
- Clear homepage
Your homepage should answer three questions fast:
- What do you sell?
- Who is it for?
- What should I do next? (Shop now, view collections, read about you)
Use a simple hero section:
- A strong line: “Affordable, high-quality [product] for [who].”
- A short supporting line
- One main button: “Shop [Category]” or “View All Products”
- Simple navigation
Avoid too many menu items. Common structure:
- Home
- Shop or Store
- Categories (with dropdown)
- About
- Contact
- Help / FAQ / Shipping
- Clean product listing pages
Show products in a grid with:
- Clear photos
- Product name
- Price
- Basic key info (size, short tag like “Bestseller” or “New”)
Allow filters for size, colour, price, type where relevant.
- Product pages that actually sell
Each product page should include:
- Multiple high-quality images (front, back, close-up, usage)
- Short and clear title
- Price, stock status, and key variations (size, colour)
- Short bullet list of main benefits
- Longer description below for those who want detail
- Clear “Add to Cart” or “Buy Now” button
One of the simplest improvements I made for my book pages was changing from “Description-heavy paragraphs” to:
- Short benefits
- Short story about why I wrote the book
- Clear calls to action
Visitors stayed longer and clicked more. That is design serving function.
- Mobile-first thinking
Most people in our region browse on phones, often with slow connections. Test your site on:
- Small Android devices
- Average data speeds
Check:
- Are buttons easy to tap?
- Is text large enough to read?
- Do pages load quickly enough?
Step 6: Add Your Products Properly
Adding products is not just data entry. It is sales in written form.
A personal lesson
At first, I treated product pages like a warehouse list:
- Title
- Price
- Short line
Sales were weak. When I started writing each product page as if I was talking to one person who needed help, things changed.
Here is how to structure your product setup.
- Organise products into categories
Examples:
- For clothing: Men, Women, Kids, Accessories
- For books: Fiction, Nonfiction, Self-help, Theology
- For electronics: Phones, Laptops, Accessories
Good categories help customers find what they need without getting tired.
- Write honest, persuasive product descriptions
A simple structure that works:
- One or two lines: what this product is and who it is for
- Short bullet list of benefits (not only features)
- Key details: size, material, technical specs, usage instructions
For example, instead of:
“Cotton T-shirt, size M–XL, blue.”
Use:
“A soft cotton T-shirt for everyday wear, made for hot African weather.
- 100% breathable cotton
- Light fabric that dries quickly
- Double-stitched seams for durability
Perfect for casual days, field work, or weekend travel.”
- Use strong images
If your budget is low:
- Use natural light near windows
- Use a clean background
- Take multiple angles
- Show scale by including a hand or common object
For digital products:
- Use simple mockups of books on screens
- Use clean graphics with clear text
- Set clear and fair pricing
Remember:
- Your price should cover your costs, your time, and a fair profit
- Too cheap may signal “low quality”
- Too expensive without clear value will scare people away
If you serve local and international customers, consider:
- Different prices by region
- Displaying prices in local currency where possible
Step 7: Set Up Payment Methods That Your Customers Actually Use
In Africa, I quickly learned that “credit card only” is not enough. Many people prefer:
- Mobile money (M-Pesa, MTN Mobile Money, Airtel Money, etc.)
- Cash on delivery in some markets
- Bank transfers
Think about your audience:
- If you sell globally:
- Consider card payments (through Stripe or similar), PayPal, and others
- If you sell regionally:
- Look for gateways that support mobile money and local cards
Key principles for payments:
- Safety
- Use a trusted payment gateway
- Ensure your site has SSL (https)
- Never store card details yourself
- Simplicity
- Reduce steps at checkout
- Do not ask for unnecessary information
- Offer guest checkout if possible
- Clarity
- Show all costs upfront: product price, shipping, taxes, any fees
- Avoid surprise charges at the last step
A personal warning
I have abandoned carts myself when a site asked for too much information or added hidden charges at the end. Your customers will do the same.
Step 8: Plan Realistic Shipping And Delivery
Shipping is where many African e-commerce dreams get stuck. Bad delivery can destroy trust faster than any bad website.
Questions to answer before you launch:
- Which regions or countries will you serve?
- Will you ship from home, a small store, or a partner warehouse?
- Will you use postal services, couriers, or local motorbike riders?
Common shipping options:
- Standard shipping: cheaper, slower
- Express shipping: faster, more expensive
- Free shipping above a certain order value
- Local pickup from a physical point
Be honest with yourself and your customers:
- If you know delivery may take 7 to 10 days, say so
- If some regions are harder to reach, communicate this clearly
For digital products (ebooks, courses, templates):
- Delivery is easier: immediate download or email access
- But you still need to handle: failed downloads, wrong email addresses, lost links
Create a clear Shipping and Returns page:
- Shipping times by region
- Shipping costs or how they are calculated
- Return and refund policy
- Contact details for support
Step 9: Test Your Store Before You Announce It
Imagine you invite guests to your home and only discover water is not running when they arrive. That is what a broken checkout feels like to a new customer.
Before you launch:
- Test like a visitor
- Open your site on your phone and a computer
- Browse categories
- Add products to cart
- Go through the full checkout process
- Test payments
- Make a small real payment if possible
- Confirm that money arrives where it should
- Test any mobile money or local payment integrations
- Test emails
- Do you receive order confirmation emails?
- Does the customer receive them?
- Are the messages clear and professional?
- Ask a friend to test
Sometimes another person will spot issues you are blind to, such as:
- Confusing wording
- Missing information
- Broken links
In my own work, readers have helped me catch strange errors I had read over ten times. Be humble enough to ask for help before you invite the whole world.
Step 10: Launch And Start Bringing Traffic
Launching is not pressing the “publish” button. Launching is telling people that your shop is open.
You can begin with simple actions:
- Tell your existing network
- Email your list if you have one
- Share with family, friends, church or community groups
- Post on your personal social media with a clear link
- Use social media wisely
Instead of shouting “Buy now” every hour, focus on:
- Showing how your products fit into real life
- Sharing stories, behind-the-scenes, and customer experiences
- Educating people related to your niche
If you sell books, talk about reading and meaning, not only “my book, my book.” If you sell clothes, talk about confidence, comfort, and local style.
- Consider simple ads when ready
You can test small budgets on:
- Facebook and Instagram ads
- Google search ads
- Marketplaces where your audience already shops
Start small, measure results, and adjust. Ads can help, but they magnify both good and bad setups. If your store is confusing, ads simply send more people into confusion.
Step 11: Measure, Improve, And Grow
Once your e-commerce website is live, your real work begins.
Use simple tools like:
- Your platform’s built-in analytics
- Google Analytics for traffic and behaviour
- Basic spreadsheets to track orders, returns, and repeat customers
Pay attention to:
- Which products sell most
- Which pages people visit before leaving
- Which traffic sources bring buyers, not just visitors
Then make small, steady improvements:
- Rewrite product descriptions that perform poorly
- Improve images for key products
- Simplify pages where many visitors drop out
A story from my “marathon”
When I realised I had hundreds of articles sitting unpublished, I did not try to fix everything in one night. I made a plan:
- Work through them one by one
- Add better titles, images, TL;DR, FAQs, and SEO
- Improve a little each day
Treat your e-commerce site the same way. It is a marathon, not a sprint.
Conclusion
Creating an e-commerce website is not reserved for rich companies with big offices in Western capitals. It is for anyone with something valuable to offer and the willingness to learn.
You have seen the path:
- Clarify what you sell and who you serve
- Choose a platform that matches your skills and budget
- Register a strong domain and secure solid hosting if needed
- Design a simple, human, mobile-friendly store
- Add products with care: good images, clear descriptions, fair prices
- Set up payment methods your customers actually use
- Plan realistic shipping and delivery
- Test your store as if you were a stranger visiting for the first time
- Launch, bring traffic, measure, and keep improving
I began my journey with weak internet, frequent blackouts, and little money. Maybe you are in a similar position today.
Start where you are.
Build step by step.
Learn from each mistake.
Let your e-commerce website become not only a source of income, but also a bridge between your story and the people who need what you offer.
Your products deserve a home online. Now you know how to build it.